Buzzer
In this tutorial we are going to use a passive buzzer. Contrary to active buzzers, passive buzzers need to be driven by a signal with a frequency. We will use the PWM functionality of the ESP32 to generate a precise frequency.
Prerequisites
We assume that you have a basic understanding of how pulse width modulation (henceforth "PWM") works, and how it is used in Toit. If necessary, have a look at the Fading LED tutorial first.
Setup
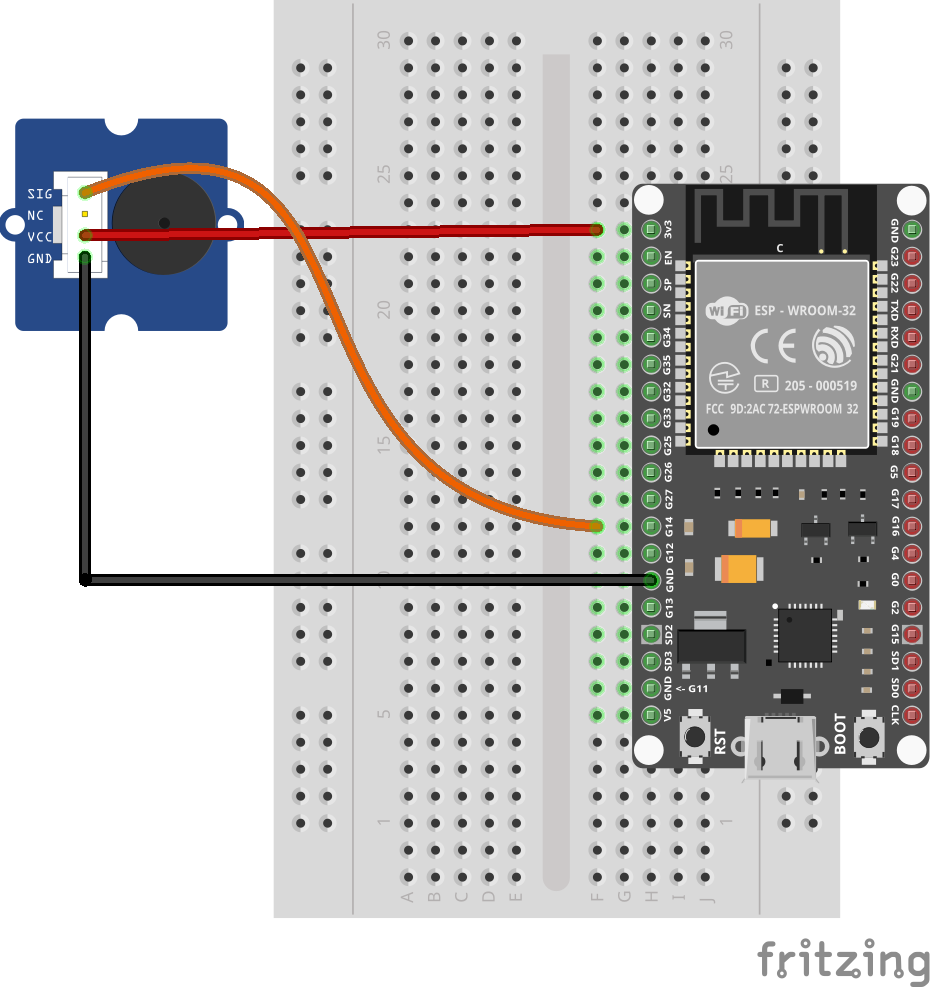
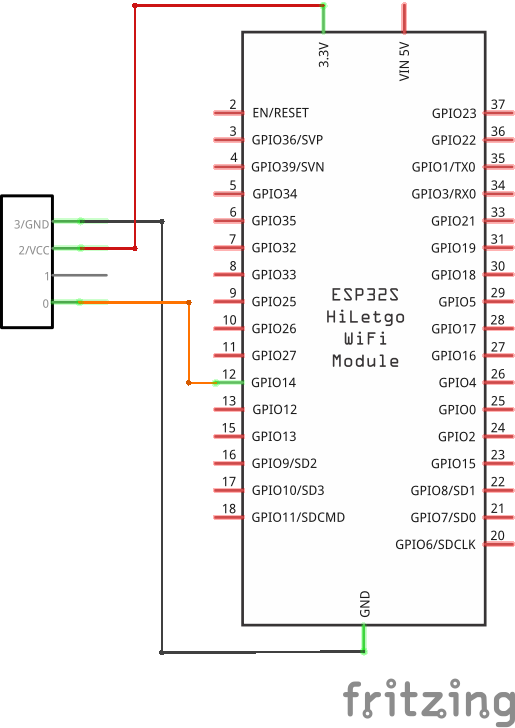
Connect the buzzer as follows:
- Connect VCC to 3V3.
- Connect GND to GND.
- Connect SIG or I/O to pin 14.
Code
Create a buzzer.toit file and watch it with Jaguar:
import gpio
import gpio.pwm

buzz pin --frequency --ms:
  generator := pwm.Pwm --frequency=frequency
  channel := generator.start pin --duty-factor=0.5
  sleep --ms=ms
  channel.close
  generator.close

main:
  buzzer := gpio.Pin 14
  20.repeat:
    buzz buzzer --frequency=800 --ms=500
    buzz buzzer --frequency=1600 --ms=500
  buzzer.close
This time we moved some of the code into its own function
buzz so we can use the code multiple times without needing to copy it.
The function buzz takes three arguments:
pin: the pin for which it should emit the frequency.--frequency, a named argument: the frequency at which the PWM should emit its square wave.--ms, a named argument: the duration, in milliseconds, for which the PWM should be active.
If everything goes well, the buzzer should emit a siren-like sound.
As you can see the PWM isn't fully designed for changing frequencies, and the programming interface for it is a bit awkward. As the name implies ("pulse width modulation") it is easier to change the width of the pulses.
Exercises
As long as the connections were done correctly you can't damage your hardware by changing your program.
- Play the tune of "Smoke on the water" by Deep Purple.
- Cycle through some different frequencies.