Binary sensors
We call "binary sensors" that can be in one of two states: on or off. Many of the common binary sensors take an analog input and compare it to a threshold. If the input is above the threshold, then the sensor is or, otherwise it is off (or vice versa).
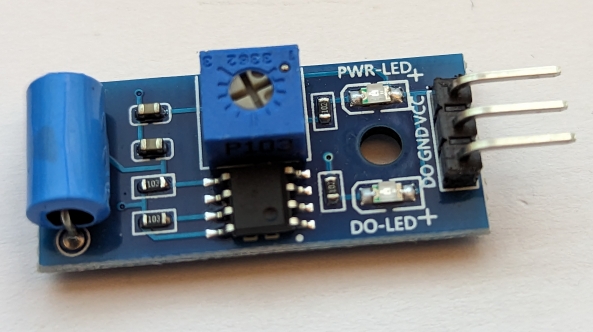
A lot of binary sensor modules can be recognized by the blue potentiometer on top of them. These sensors allow the user to change the threshold by turning the potentiometer.
Prerequisites
Binary sensors are mostly just "automated" buttons. We recommend to have a look at the Buttons tutorial before starting this one.
Hardware
This tutorial works with any sensor that communicates its state using a single pin that is either on or off.
We have tested it with the following sensors:
- a vibration sensor
- a noise sensor
- an IR distance sensor
- a light sensor
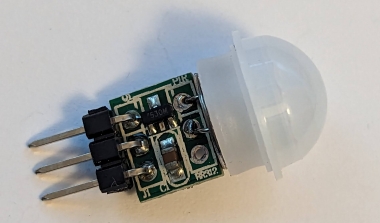
- a PIR motion detector
Setup
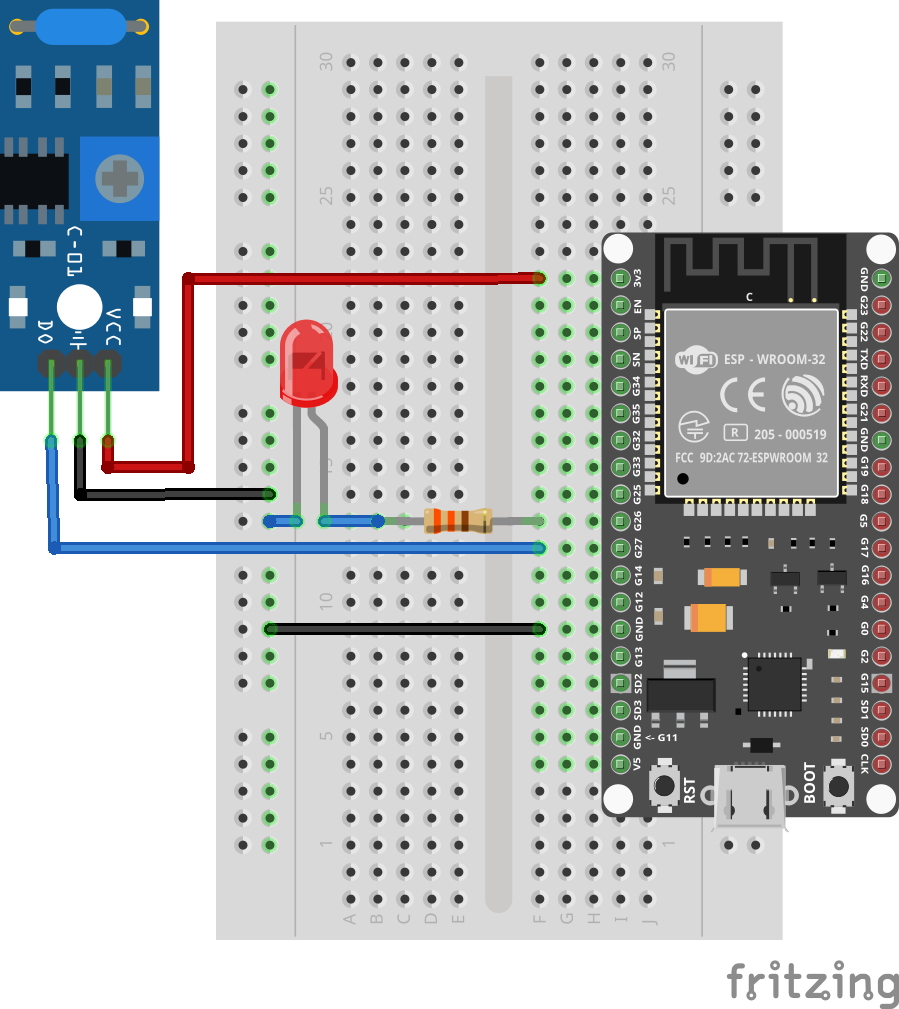
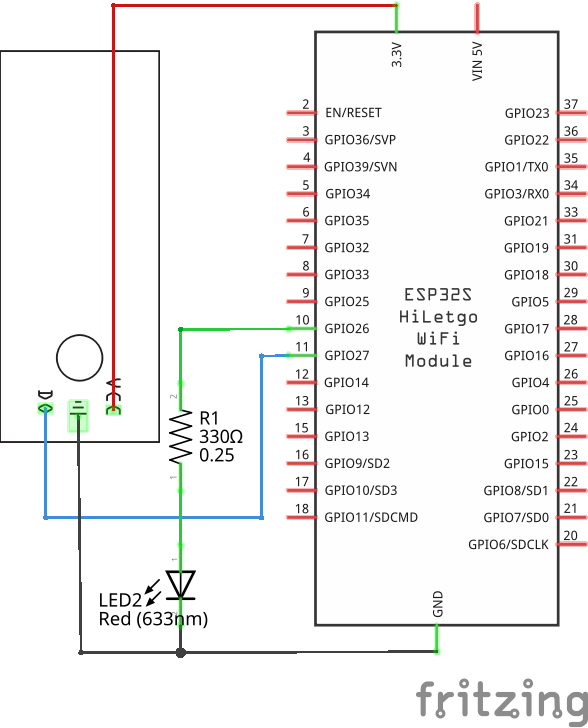
Connect the LED and the 330Ω resistor so that they are in series between pin 26 and GND. See the LED and LEDs tutorials for more details.
Connect the board's 3V3 pin to the sensor's VCC pin, GND to GND and the sensor's DO or I/O pin to pin 27.
LEDs have a direction. The longer leg must point to the pin (the positive side).
Code
Create a new file binary.toit and start jag watch binary.toit to
run the program whenever you save.
import gpio

main:
  led := gpio.Pin 5 --output
  sensor := gpio.Pin 27 --input

  while true:
    sensor.wait-for 1
    led.set 1
    sleep --ms=1000
    led.set 0
This program uses the wait-for method on the Pin class to wait for
the sensor pin to reach the 1 state. If your LED triggers too easily or
not often enough, change the threshold by rotating the blue potentiometer.
Vibration sensor
Vibration sensors can be quite difficult to calibrate. We found it easiest to turn the potentiometer to the left until the D0 LED turns off. Then turn the sensitivity up again, until the LED turns on again. Check by clapping the module alternating on both sides (which worked significantly better than just one side).
The sensor (SW-420) uses a spring inside the cylinder. So make sure to give it time to stabilize before attempting a new calibration.
IR distance sensor
Many infrared sensors don't work in sunlight. Make sure to be in an environment where there isn't too much ambient infrared light.
Exercises
Without analyzing the sensor we have to assume that the OUT/DO pin may provide more current than the ESP32 can handle. If the sensor's OUT/DO pin is connected to an ESP32 pin that is configured as output, then the sensor or the ESP32 could get damaged. Always make sure that the sensor's OUT/DO pin is connected to an ESP32 pin that is configured as input.
For additional safety one could add a 330Ω resistor between the sensor's OUT/DO pin and the ESP32.
- Using a noise sensor, turn on the LED when the noise sensor detects a clap. Turn it off again with the next clap.
- Using a noise senso, let the LED blink when the noise sensor detects
a clap. Turn the blinking off again with the next clap. This exercise
requires the blinking code to run in parallel with the noise-detection
(
sensor.wait-for) code. You probably want to use Toit's tasks for this. - Take a light sensor and configure the sensitivity so that the sensor detects when a cupboard is opened. If you have a battery pack, put the sensor into the cupboard and detect when someone opens it.
- Do the same for the distance sensor.