Fading light
In this tutorial we will change the brightness of an LED using Pulse Width Modulation (PWM).
Prerequisites
This tutorial assumes that you know how to control a single LED. If necessary, have a look at the single LED tutorial first.
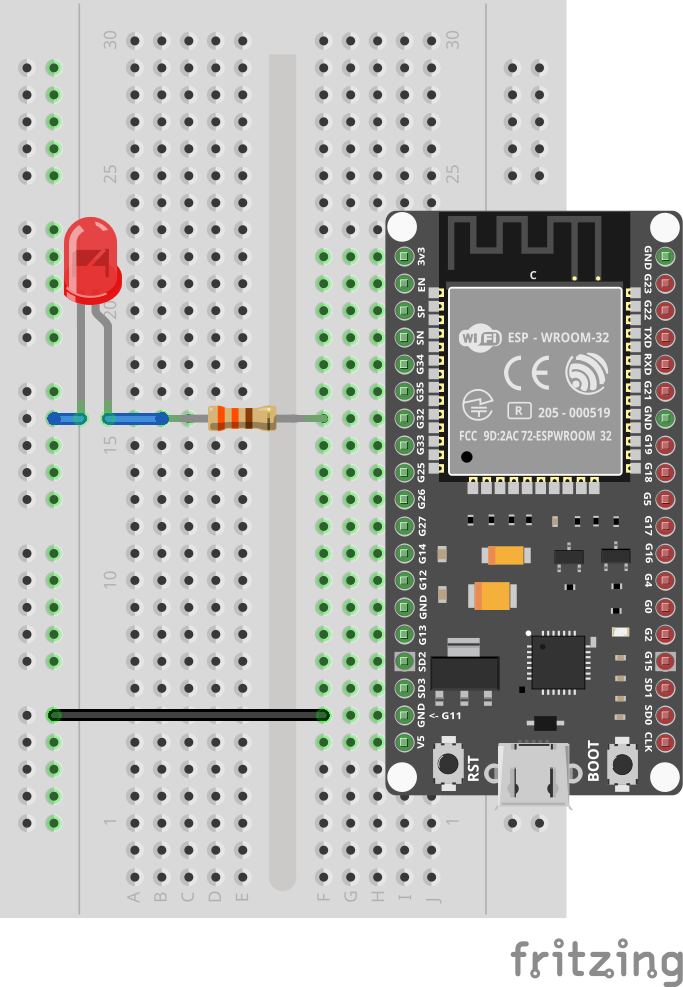
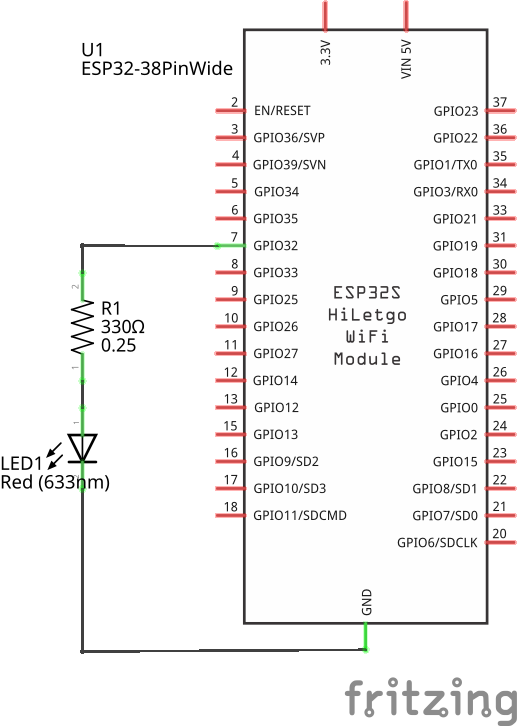
Setup
The setup for this tutorial is identical to the one from the single LED tutorial.
Code
As seen earlier, we can turn a single LED using pin.set.
This example turns on the LED for 10 seconds, before stopping the program (and automatically turning off the LED again).
Save it as pwm_led.toit and let jag watch it.
The intuitive way of changing the brightness would be to change the current that goes through the LED. Replacing the resistor with a higher one would do that. (You can put two or three resistors in series if you want to try that).
From a programming point-of-view that's not a practical solution, though. Instead we are going to exploit the fact that human eyes can't see changes that happen too quickly. We are going to turn the LED on and off so fast that the eye won't notice it anymore.
By playing with the proportions of on/off times we can change the perceived brightness of the LED.
Let's start by trying to do this by hand:
import gpio

main:
  led := gpio.Pin 32 --output
  while true:
    led.set 1
    sleep --ms=1
    led.set 0
    sleep --ms=1
Here we are trying to turn on the light for 1 millisecond, and then turning it off for 1 millisecond again. Unfortunately, the result isn't perfect. While the LED does look a bit less bright, we can definitely see some flickering happening.
Clearly, the sleep calls aren't just taking 1 millisecond, as the human eye would not be able to detect such a high frequency.
The reason is simple: the Toit virtual machine isn't fast enough to run the program at the speed we ask it to. Also, running in such a tight loop would waste a lot of CPU resources that could be used for other things.
Since such a feature is extremely common, the ESP32 has a hardware peripheral that does the job for us. It's called PWM (pulse-width modulation). A PWM signal is just a square wave where the relative width of the high and low bits are changed depending on the duty cycle.

The ESP32 hardware functionality does all of this for us. We only need to specify the frequency and the duty cycle, and it will emit the needed square wave.
Here is the program that uses the PWM peripheral:
import gpio
import gpio.pwm

main:
  led := gpio.Pin 32
  generator := pwm.Pwm --frequency=400
  channel := generator.start led
  channel.set-duty-factor 0.5
  sleep --ms=10_000
  channel.close
  generator.close
  led.close
A third of the code is just closing the resources we use (all the close
calls). The more interesting lines are in the beginning:
We start by creating a square-wave generator of a certain frequency. Then we use the generator to apply a square wave on the LED pin. Finally, we set the duty factor of the channel we just created.
We can now play with the duty factor:
import gpio
import gpio.pwm

main:
  led := gpio.Pin 32
  generator := pwm.Pwm --frequency=400
  channel := generator.start led
  duty-percent := 0
  step := 1
  while true:
    channel.set-duty-factor duty-percent/100.0
    duty-percent += step
    if duty-percent == 0 or duty-percent == 100:
      step = -step
    sleep --ms=10
Here we increase the duty percentage by 1% at every iteration. Once value hits 100, we reverse the step-direction and decrease it again. The end-result is an LED that fades in and out continuously.
Exercises
As long as the connections were done correctly you can't damage your hardware by changing your program.
- Change the speed of the fading in and out.
- Change the base-frequency to 40. Can you detect the flickering?
- Connect more LEDs and use the generator to control more than one LED. The individual LEDs should all have their own channel with different duty factors.