Setting up the IDE
This tutorial guides the reader through the installation process. It is an extended version of the Get Started documentation.
Start by installing Visual Studio Code (henceforth "vscode").
Then install Jaguar (Releases).
On Windows 10+ simply open powershell, and run:
For older Windows versions, download and install Jaguar from here.
Visual Studio Code has an integrated terminal.

Whenever we ask you to run a command, use this terminal. To do that simply open a new terminal (or use an existing one) and type the command there.
Run the following command in a terminal:
If this step is skipped the extension will remind you later.
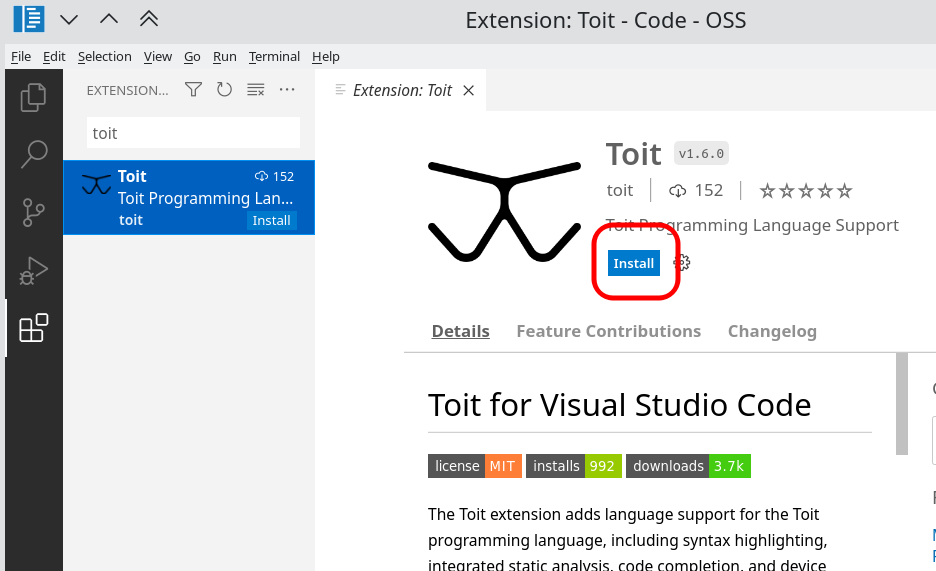
Install the Toit extension
In vscode click on the gear icon and then "extensions".

Search for Toit and install the extension.
Open a folder
When working in Toit we recommend to use separate folders for different projects. Vscode has the notion of "opened folder" which is used by the Toit extension to know where to put files and whether files are related.
After opening a folder, vscode also automatically opens terminals in that folder, which is often a requirement when running commands (specifically package commands).
Click on "Open Folder" and go into a (probably fresh) folder.
When you open a new terminal you should now see the name of the folder (although this depends on your operating system).
Prepare a device
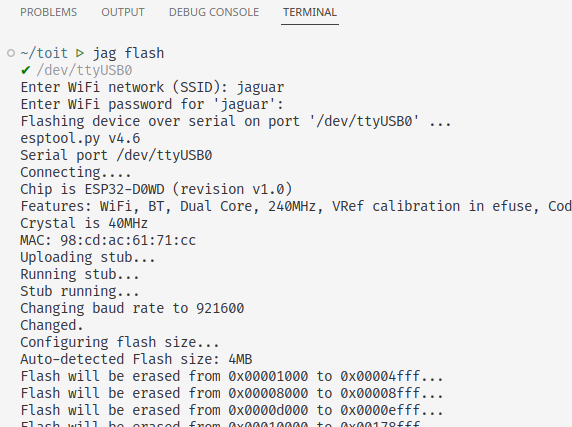
Plug in your ESP32, and, in a terminal, run the following command:
Select the USB port the device is connected to. If no correct serial port shows up, have a look at our trouble-shooting page or follow the guide on Espressif's page to establish a serial connection with the ESP32.

Then enter the WiFi credentials of the network you want to connect to.

As soon as the credentials are submitted, the flashing process starts.
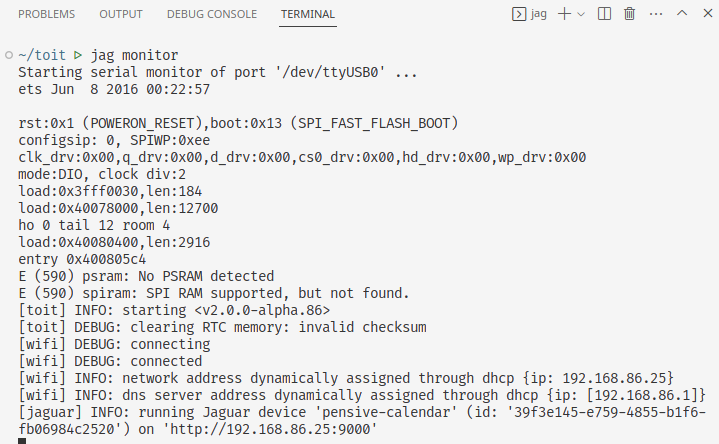
When the flashing is done, run jag monitor to verify that the device is
connecting correctly to the WiFi:
The jag monitor will run until stopped with ctrl+c, or when the device is
physically disconnected.
Running jag monitor has two effects:
- it reboots the device (unless used with
--attach), and - it shows the output of programs.
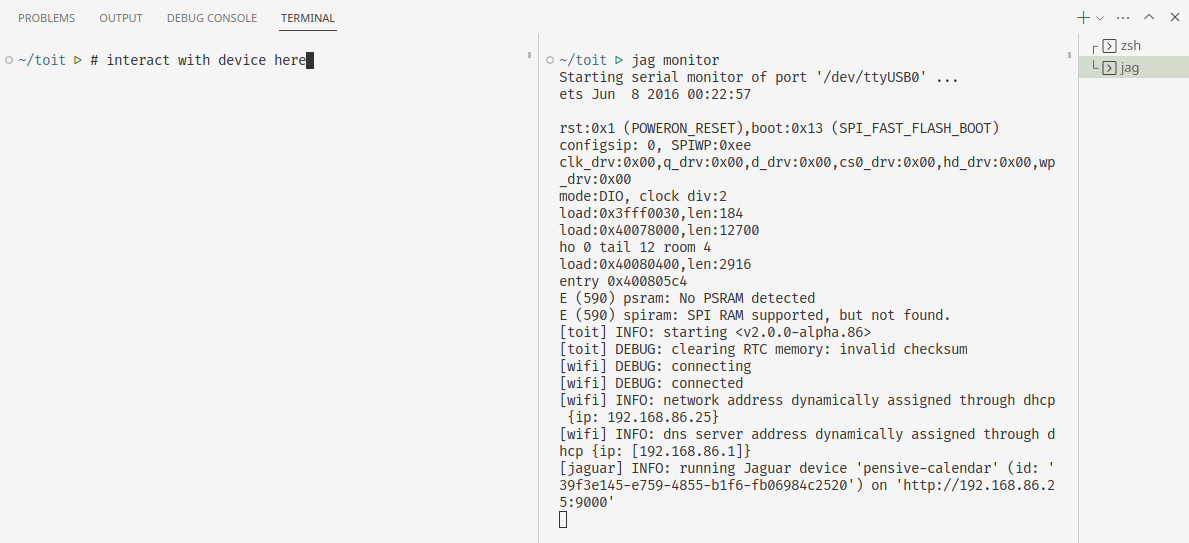
During development it's convenient to always have a terminal monitoring the output of the device. A common setup thus consists of having two terminals open at the same time. One to interact with the device and one to monitor the output. Vscode's "split terminal" comes in handy for this.
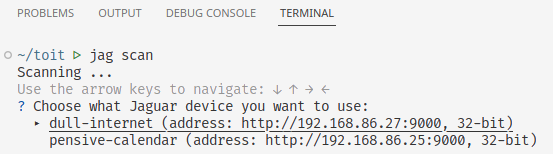
Selecting a device
Jaguar has the notion of a "default device". This is the device that is used
when no device is specified. If you have multiple devices, or just want to
set the default one, you can select a device by running jag scan.
Note: Jaguar uses UDP broadcast messages to find all ESP32 devices. This means that the desktop and the ESP32 need to be in the same network for this to work.
If jag scan can't find your device, you can also help jag by providing the
IP address of the device. This is done by running jag scan <ip-address>. The
IP address can be found in the output of jag monitor. For example:
Your development environment is now ready to use. You can start writing programs in Toit and run them on your device.
Next steps
Have a look at the first programs tutorial to learn how to write a Toit program and run it on the device.