DHT11
The DHT11 sensor is a cheap sensor that communicates over temperature and humidity over one wire (in addition to power and ground).
Prerequisites
We assume that you have set up your development environment as described in the IDE tutorial.
We also assume that you have flashed your device with Jaguar and that you are familiar with running Toit programs on it. If not, have a look at the Hello world tutorial.
Setup
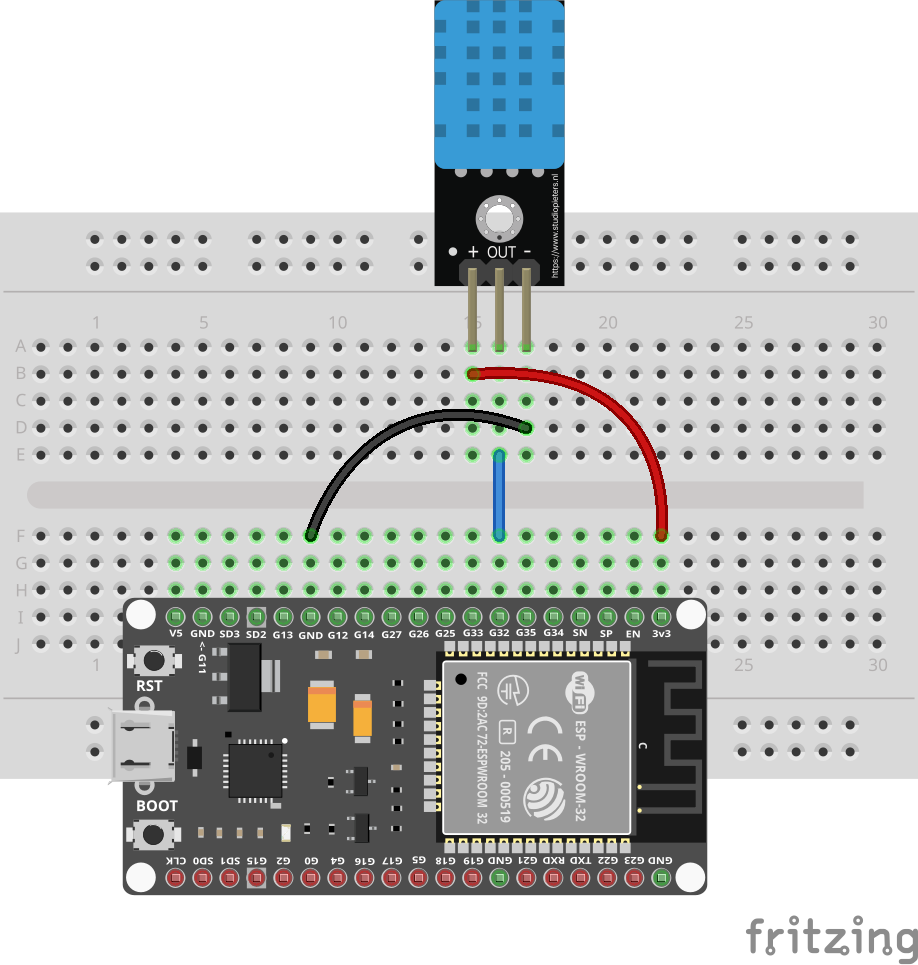
Connect the DHT11 sensor as follows:
- Connect the sensor's VCC/+ pin to the ESP32's 3.3V pin.
- Connect the sensor's GND/- pin to the ESP32's GND pin.
- Connect the sensor's DATA/OUT/S pin to pin 32.
There are many different variants of DHT11 modules and they don't always have the same pin-out. Be sure to check the pin-out of your module before connecting it. We have seen multiple DHT11 sensors being destroyed because they were connected the wrong way.
Packages
The driver for the DHT11 is not part of the standard Toit distribution, but must be downloaded as package. See the packages tutorial for details.
We are using the dhtxx (and not the "dht11") package. To install it, run the following command in your project directory:
You can probably just write jag pkg install dhtxx, but the full ID together
with the version is more explicit, and will make sure you get the right package.
Code
Write and Jaguar-watch the following dht11.toit program:
import dhtxx
import gpio

GPIO-PIN-NUM ::=  32

main:
  pin := gpio.Pin GPIO-PIN-NUM
  driver := dhtxx.Dht11 pin

  (Duration --ms=1000).periodic:
    print driver.read
This prints the temperature and humidity of the sensor every second (which is the recommended minimum interval for the DHT11 sensor).
Under the hood
The communication between the ESP32 and the sensor is time-sensitive. It's thus a good idea to let the microcontroller do the work with hardware functionality.
The dhtxx driver does this using the RMT (remote control) peripheral whose primary function is to send and receive infrared remote control signals. By holding it the right way the RMT module is, however, also very convenient to send and receive precisely timed signals.
Exercises
As long as the connections were done correctly you can't damage your hardware by changing your program.
- Connect an additional LED (don't forget the resistor) and turn it on when the temperature reaches a certain threshold.
- Show the current temperature and humidity on a display.