MQTT with Qubitro
Qubitro is a device data platform with an MQTT endpoint. The broker can be used freely for a limited number of devices.
Prerequisites
We assume that you have set up your development environment as described in the IDE tutorial.
We also assume that you have flashed your device with Jaguar and that you are familiar with running Toit programs on it. If not, have a look at the Hello world tutorial.
While not necessary, we recommend to do the MQTT tutorial first. Similarly, you might want to read the services tutorial.
Packages
Instead of using the MQTT package directly, we are going to use the qubitro package. It provides a service-oriented interface to the Qubitro MQTT broker.
See the packages tutorial for details on how to install packages.
jag pkg install github.com/kasperl/[email protected]
You can probably just write jag pkg install qubitro, but the full ID together
with the version is more explicit, and will make sure you get the same package
as used in this tutorial.
Qubitro
To use Qubitro, you need to create an account. Roughly you have to do the following:
- Go to qubitro.com:
- Get started -- it's free.
- Sign up.
- Complete the verification of your email.
Then create a new project with an MQTT source:
- In the "Projects" tab, click on "New Project" and create a new project.
- Click on the new project.
- Click on "New Source" and pick "MQTT".
- Fill in the data. All fields are required but can be changed later.
- Click on the device.
- Click on the "Connection details".
- Copy out the username and password. You will need them later.
Code
Qubitro can be used like any other MQTT broker. However, in this tutorial we are using the Qubitro package which encapsulates the MQTT client into a service that can be accessed through RPC calls. This has the advantage that the code is smaller, and that multiple different containers can use the same client without needing to establish a new connection for each container.
Start a new Toit program qubitro.toit and add the following code:
import qubitro
import qubitro.service

main:
  // Start the Qubitro service.
  service.main

  // Connect to the service and publish through it.
  client ::= qubitro.connect
  client.publish { "MyData": random 1000 }
Note that we haven't specified the username and password in the code. We are providing it through Jaguar defines. Launch the program as follows:
jag run \
    -Dqubitro.device.id=<YOUR-USER-NAME> \
    -Dqubitro.device.token=<YOUR-PASSWORD> \
    qubitro.toit
You should see a new value appear in the storage tab of the device.
The -D flag only works for run, but not for watch. It is also not
supported for -d host. If you want to use Qubitro without an ESP32 device
you can either modify the qubitro package, or use the mqtt package directly.
Running the Qubitro service in a separate container
So far we have been running the Qubitro service in the same container as the main program. However, it is possible to run the service in a separate container and access it through RPC calls. This is useful if you have multiple containers that need to access the same Qubitro client.
Create a new file qubitro-service.toit with the following code:
We can install the service as a container as follows:
jag container install \
    -Dqubitro.device.id=<YOUR-USER-NAME> \
    -Dqubitro.device.token=<YOUR-PASSWORD> \
    qubitro qubitro-service.toit
At the same time we need to modify the qubitro.toit program to remove the
service start:
We can now run the program without needing the defines:
In fact, we can now jag watch the file and execute it as soon as we save it.
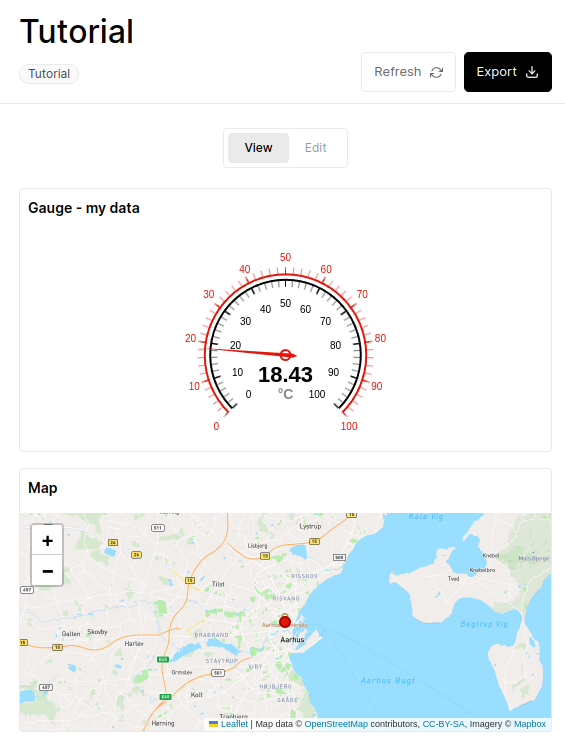
Qubitro dashboards
One nice feature of Qubitro is the possibility to create dashboards that visualize the published data. The following is just an example that uses some values that were published while writing this tutorial:
You can follow Qbitro's dashboard documentation if you want to create your own dashboard.